| Icosihenagon |
 |
Every point connects to every other point of this icosihenagon (a 21-sided polygon)... with one long continuous piece of thread! Be sure to start with a full spool of thread. This model uses paper fasteners and the rim of a plastic lid to support the thread design, but there are many materials you can use: |
||
|
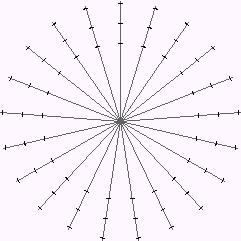
1) Click and print this large 21-point design template to help you space your pegs evenly in a circular shape on the design backing. 2) Press map pins, straight pins, or small nails through each of the 21 points forming one circular ring. If you need a design of a larger size, use a straight edge and pencil to extend the 21 radial lines, then measure and mark 21 points along these extended lines. After you have pressed the pegs through the 21 points, carefully pull the paper off of the board. (It will rip where the pegs have pierced it.) |
 |
||
| Variations: * Use paper fasteners and a plastic lid or posterboard. * Lay a sheet of wax paper over the design template before you begin so that when you are finished, you can coat the threads with glue, let the glue harden, remove the pegs, and have a stand-alone icosihenagon. In this case, do not remove the wax paper and the template until you have completed the project. |
|||
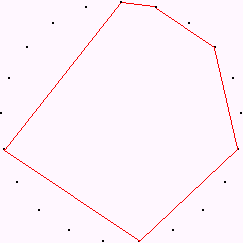 The first 6 steps are complete. |
3) Tie the end of the thread around the top peg. You are about to begin wrapping the thread around a series of pegs, counting carefully. Important: each time you begin counting pegs, the peg you start from is "0" (don't count it!), and the next peg moving clockwise is counted as "1." You will complete ten steps in each "round," and you will repeat the sequence 21 times! Here are the ten steps: | ||
|
(1) From your starting point (0), wrap the thread around the next peg (Peg 1). (2) From this new starting point, count 2 pegs and wrap the thread around the second. (3) From this new starting point, count 3 pegs and wrap the thread around the third. (4) Count 6 pegs, and wrap thread around the 4th. (5) Count 5 pegs, and wrap thread around the 5th. (6) Count 6 pegs, and wrap thread around the 6th. (7) Count 7 pegs, and wrap thread around the 7th. (8) Count 8 pegs, and wrap thread around the 8th. (9) Count 9 pegs, and wrap thread around the 9th. (10) Count 10 pegs, and wrap thread around the 10th. |
|||
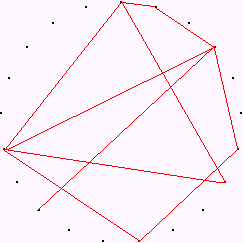 The first 10 steps are complete. |
4) Be sure your project looks like the drawings after 6 steps and 10 steps. After you finish the first 10 steps, make a mark on a piece of paper. Now start the 10 steps over again, continuing from the peg you reached on the 10th step. After you complete the second set of 10 steps, make a second mark on the piece of paper. Repeat the 10 steps 21 times. You might like to work with a partner: one person helps to count the pegs and record how many times the 10 steps have been repeated, and the other person wraps the thread around the pegs. |
||
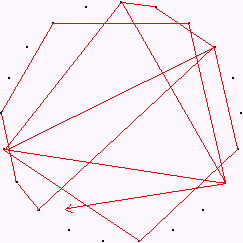 The first 16 steps are complete. |
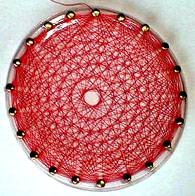 Your design should look like this after you have completed the 10 steps 21 times. |
||
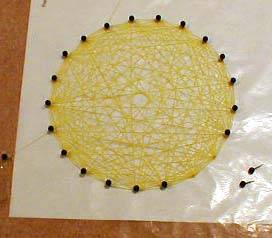
| 5) Tie off the thread on the final peg. If you are using wax paper to make a stand-alone design, you may mix white glue with some water and spread a thin layer over the design using a paintbrush. Be sure to coat all of the threads. 6) After the thread dries, you may remove the pegs. In this picture, the first two pegs have been removed. |
 |
||
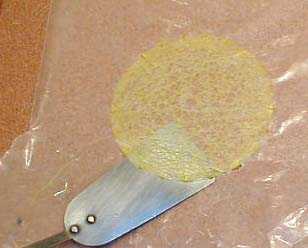 |
7) Use a spatula to loosen and lift the design from the wax paper. | ||
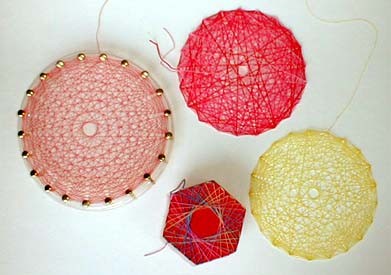 | |||
| Here are three models of the icosihenagon design. The two without pegs have been stiffened with glue. They can all be hung up. (The hexagon-shaped box shows how a string or thread design can also be glued onto the top of a cardboard or wooden box.) | |||